

Here are five of my favorites!! It was really hard to pick just five. There will probably be a sequel to this post.
I've created these "Five Faves" posts so that you can do one project each week day! These posts are particularly good for school vacation weeks.
Before we start... first the safety speech:
A few of these ingredients and directions are not safe for kids or tots. Please read labels and proceed with caution. While I've seen ALL of these done with and for kids many times, I am a safety queen and I think safety should always come first.
 DO NOT let your children consume these ingredients.
DO NOT let your children near the glue gun. They get VERY hot!
Make SURE to seal all bottles (see below) so that the substance AND the bottle lid do not become a hazard for your child or baby (or get all over your house).
When you store these bottles, put them where your kids/babies cannot get them so that they play with them ONLY while being supervised by an adult.
Sealing the bottles (very important for safe play):
After filling each bottle seal the lids on by gluing them with a hot glue gun. This makes it harder for kids and babies to get the lid off which would not only make the bottle spill everywhere but also make the lid a choking hazard and make the substance a dangerous thing to consume in some cases.
Put a small amount of hot glue on the inside of the lid and then quickly screw the lid on. Then add hot glue around the outside edge of the lid where it meets the bottle. Be careful not to let anyone play with bottles until the glue is completely cooled off and hardened. Also, don't put too much glue on the inside because it may drip into the bottle when you put the lid on.
Choosing the bottles:
What you need to find is bottles that are/have:
-very smooth sided (to see through)
-very strong plastic (to avoid smushing or cracking)
-a label that comes of nicely
-average sized screw on caps (some bottles these days have very shallow caps with few threads)
-a nice size for small hands to hold onto (also - too big can be too heavy if filled with fluids)
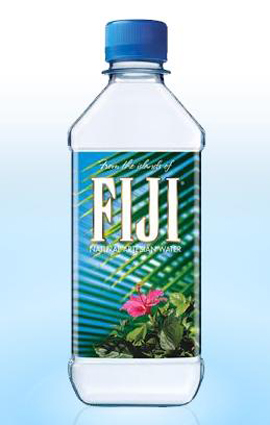
I chose Fiji water bottles which are strong, and very smooth sided.
* * * * * Making The Bottles * * * * *
Monday: Oil and Water Bottle
This bottle is typically done with vegetable oil. I use mineral oil (pharmacy section) which is completely clear and has a very cool effect with the water because they are both colorless and clear but they are clearly divided too! In this case I used red food coloring but you can leave that out if you want.

ingredients:
-water
-food coloring (optional)
-mineral oil
FIRST fill the bottle about half way with water.
Next add the food coloring to the water (optional).
THEN fill the rest of the bottle with mineral oil.
Seal on the cap (see above).
Now flip and shake the bottle to see how cool it is!
Shake the bottle really hard and then check back in a bit and see how separated it has gotten again.
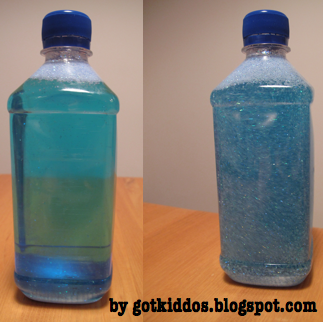
Tuesday: Bubble Bottle
This bottle looks almost boring when it is settled but will surprise you with a few shakes... see the difference in the pic?!

ingredients:
-water
-Dawn dish detergent
Add a small amount of water to the bottle (about an inch or so).
Then squirt a few squirts of Dawn dish detergent into the water.
Seal on the cap (see above).
Shake and be surprised at how quickly it fills the whole bottle with bubbles! Then, let it sit and see that all the bubbles disappear again!
Wednesday: Straw Bottle

ingredients:
-cut up colorful drinking straws (an inch long or shorter)
-water
Fill the bottle most of the way with water (leaving a few inches of air at the top).
Drop in pieces of drinking straw that are cut to be an inch long or shorter (shorter for smaller bottles).
Seal on the cap (see above).
Shake and flip the bottle upside down to see the pieces swirl around.
Thursday: Corn Syrup and Oil
This one was my own invention. I tried it out when I made a huge set of discovery bottles for my old classroom. The result was amazing! It was cool but less amazing when I tried it out this time around. I think the difference was that I used light corn syrup this time around and I think it was a heavier corn syrup last time.

ingredients:
-mineral oil
-corn syrup
-food coloring
Fill about half of the bottle with corn syrup and then add the food coloring to the corn syrup and stir it in with something long.
Then, fill the rest of the bottle with mineral oil.
Seal on the cap (see above).
Shake, flip and enjoy!
Friday: Glitter Bottle
I've saved one of the best ones for last.
ingredients:
-water
-fine glitter
-food coloring (optional)
Fill the bottle most of the way with water (leave about an inch of air at the top). Add some food coloring if desired.
Pour in a bunch of glitter. Fine glitter is best.
Seal on the cap (see above).
Shake it a a lot to break up the clumps of glitter (just the first time) and then shake it just enjoy the sparkles!!
There you have it! Five fun bottles to play with! Enjoy!!

More "Five Faves" Fun:
 |
| Five Faves: A Week of Dough and Goo |
bored
ReplyDeletevery interesting
ReplyDeleteNice
ReplyDeleteit is really calming thax
ReplyDeletei really like this it is fun
ReplyDeletepoop
ReplyDeleteNice
ReplyDelete